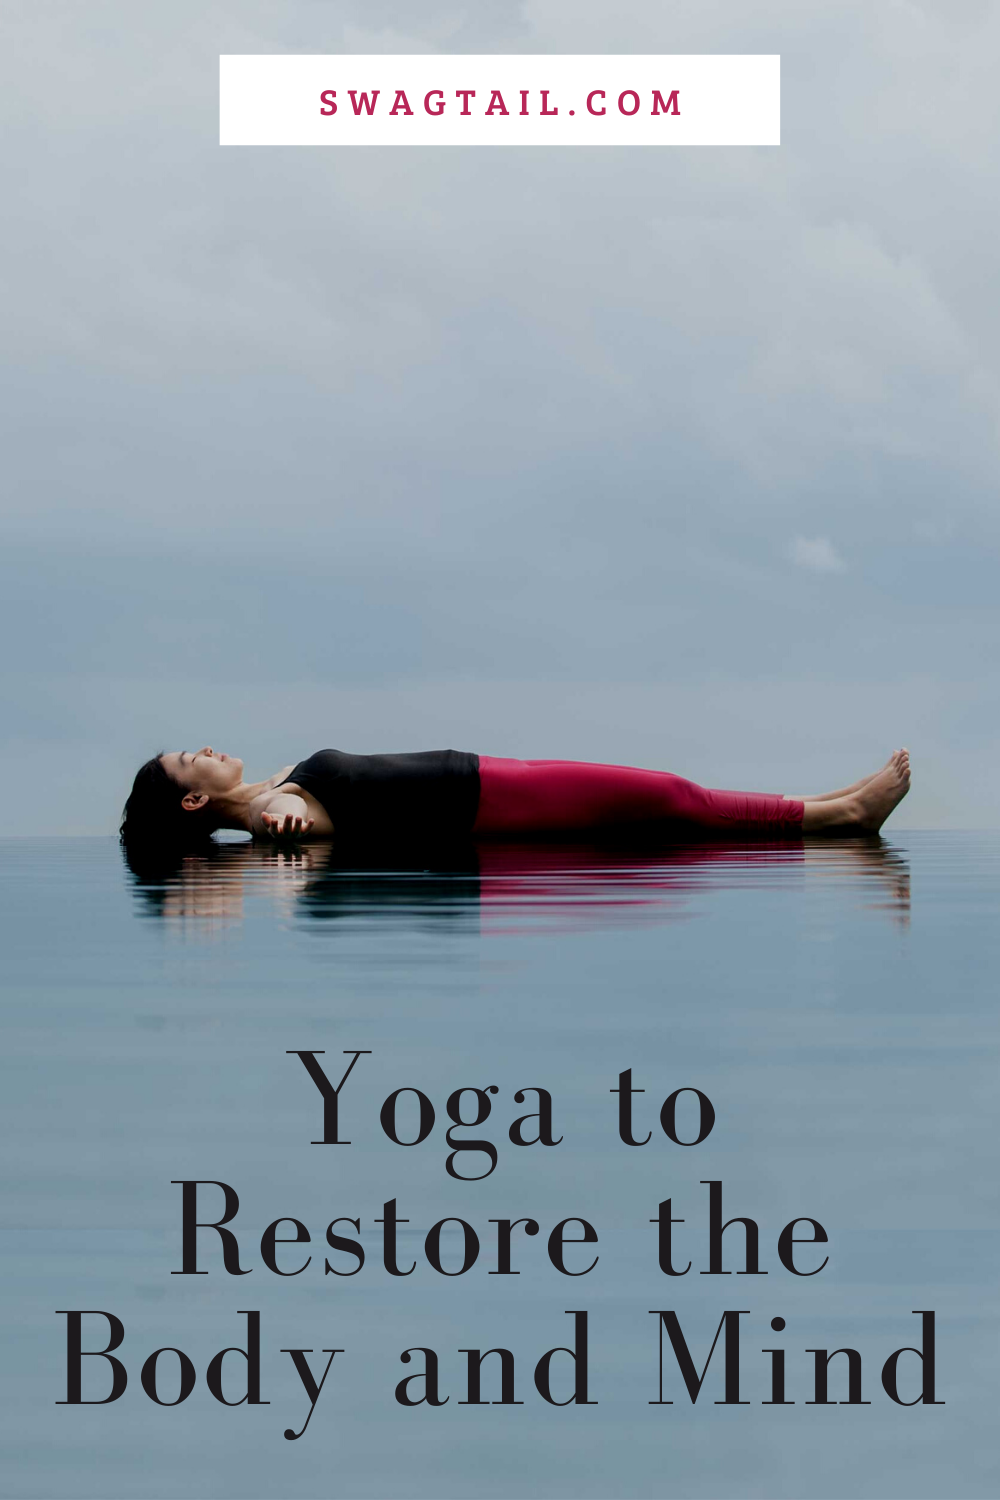
 Stress is a given in life. In fact, we often seek challenges on the yoga mat to gain strength, flexibility, coordination. When pushed too hard—on the mat or in life—our bodies can no longer adapt to the demands in front of us. We shift from eager to drained. We move from capable to overwhelmed. This can be a fine line, and a heightened level of awareness on the yoga mat can prevent you from crossing it. The sequence this week uses yoga to restore your body and mind. It gives you permission to step away from your familiar environment and take a break. In this space, you gain clarity, energy, and perspective.
This sequence is meaningful to me for two reasons.
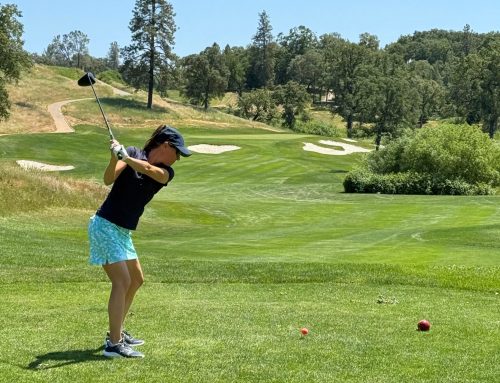
First, I use recommend several of these poses to my clients who are athletes (and more specifically, golfers). The poses below are also part of a larger sequence in my upcoming book, The Flexible Golfer.
Second, in coming to the final phases of editing for this book, I’m tired myself. The work is highly detailed and I must rise to the occasion with greater focus. It feels like the last mile of a marathon. It’s in these moments I’m encouraged to end on a high note and ride a surge of energy to the finish line.
However, I notice I’m dancing precariously close to decline. I’m walking the tightrope between loving what I do and having it completely consume my life. That’s why I honor my energy levels on the yoga mat. I practice a slow flow during the day, and I’m definitely doing more yin and restorative yoga at night to help me sleep. I’m also utilizing meditation regularly to stay aligned.
If you find yourself on the brink of fatigue or in need of some relaxation after a long day (or training session), this class below is for you. I hope you enjoy it as much as I do!
Cover Photo Credit: Joesayhello
Yoga Images: Ember and Earth Photography
GENERAL ADAPTATION SYNDROME
A few weeks ago, we talked about the Phases of Adaptation and the importance of recovery after an intense period of training for athletes. I’d like to share another diagram that will reinforce the importance of using yoga to balance the body and mind. It’s about the general adaptation syndrome, which was first noted by endocrinologist Hans Selye in the mid twentieth century.
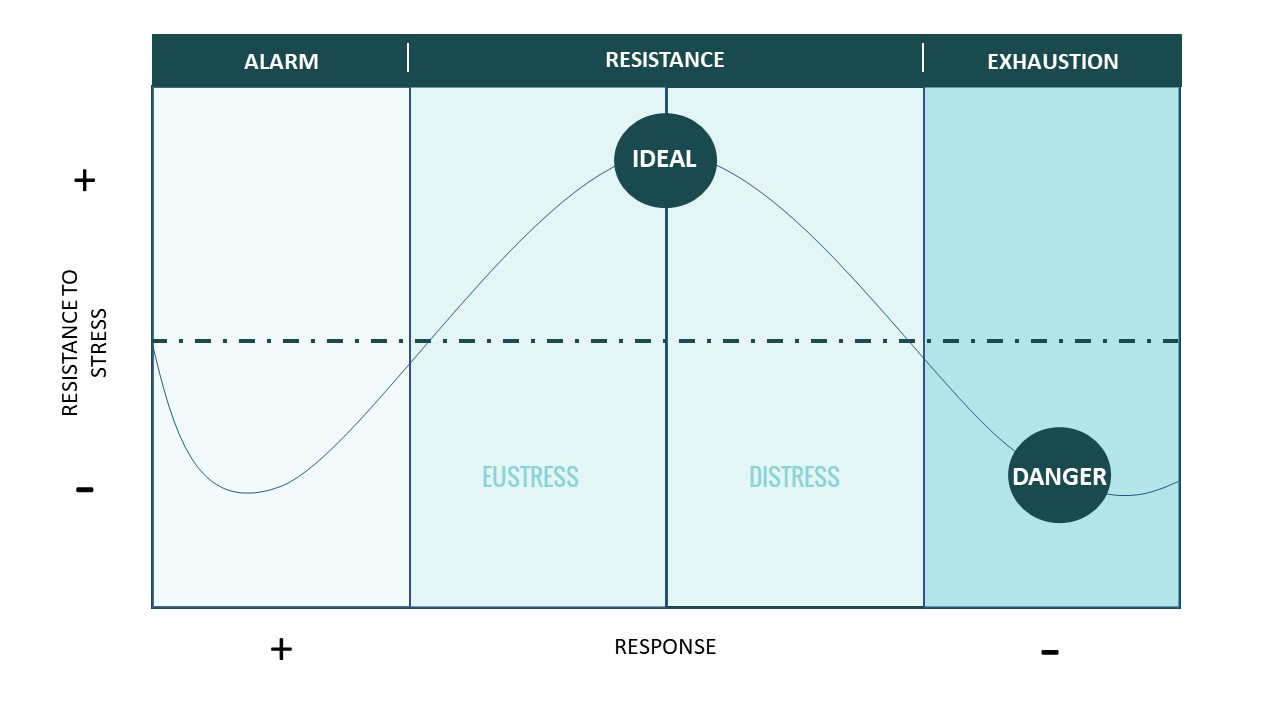
Selye proposed there are two types of stress: eustress (positive stress) and distress (negative stress). When faced with a new challenge on the yoga mat or in any area of life, your body must work hard to adapt. Stress hormones are released in the alarm stage to meet these demands. The body then works hard so you can find balance under your new set of circumstances. This is important to our growth and gives us the ability to improve. You’ll notice this response on the left half of the diagram above. Ultimately we can do better under pressure… up to a point.
Too much strain can turn eustress into distress and your body can no longer resist the stressors you’re facing. You go from a balanced state to an imbalanced one. This might start as chronic stress, and then turn into long term hormonal issues, anxiety, and compromised immune function. You hit the exhaustion phase. Staying here long enough, without recovery, will ultimately lead to a premature death.
That’s why we’ll use yoga to balance the body and mind before you hit the tipping point. We’ll nurture your nervous system and entire being with the gentle yoga poses in this sequence. The end result is that you’ll be refreshed, energized, and ready to meet the challenges of your life with greater clarity.
Props Needed for the Sequence:
- Tennis ball, golf ball, or RAD rounds (myofascial release ball, smaller size)
- Blanket or rolled yoga mat
- A wall space
(1) FOOT RELEASE
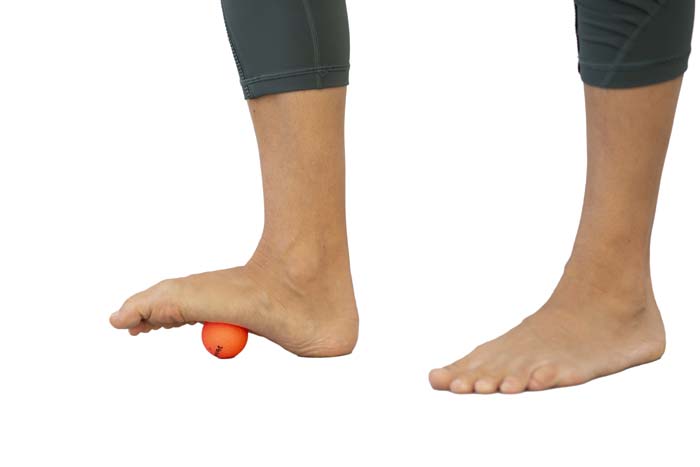
The feet have two critical roles: bearing your body weight and propelling your movement. Unwanted tension—caused by overactivity, injury, or poorly-fitted shoes can hinder both functions. That’s why it’s essential to address the fascia in the feet on a regular basis. The fascia on the underside of the feet continues up the back of the calves, hamstrings, sacrum, and entire back line of the body. Thus when you release tension in the feet, you positively affect these other areas as well.
Start with a golf ball or tennis ball:
- Stand or sit with both feet on the ground. Notice any sensations on the underside of each foot.
- Place the ball under the center of one foot. Lean into the ball to increase the pressure. Ease your weight on that foot to make it easier. You can curl or extend your toes to modify the sensations as well. Find any tender area and stay for 30-60 seconds.
- Gently roll the ball under as much surface area on the bottom of that foot as possible. Continue this scribbling technique for about 1 minute.
- Remove the ball from under your foot. Stand or sit in your starting position. Observe any new sensations in the feet or legs. Repeat the same movements with the second foot.
(2) DANDASANA
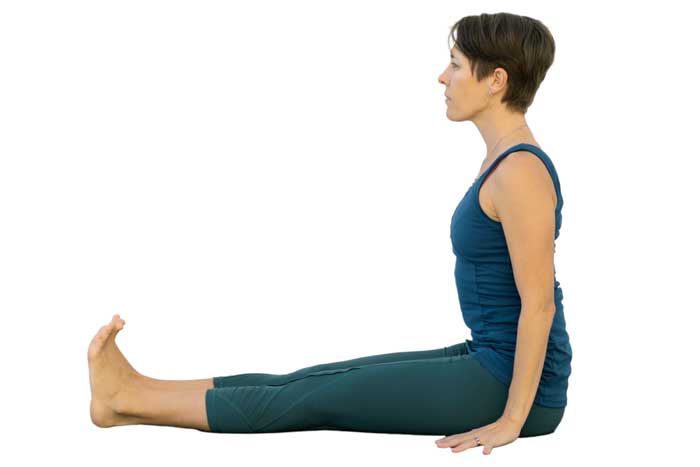
Also known as Staff Pose, Dandasana is a symmetrical way to set the tone for the upcoming seated postures. It also lengthens the spine and hamstrings while encouraging good posture. Use this pose as a way to get grounded in your yoga practice and to tune into the subtle sensations of your body. Breathe deeply as you use yoga to restore your body and mind here.
Start seated:
- Extend your legs out in front of the torso. Keep them together and lightly flex the feet. Point your toes up. If your torso is leaning backward, sit on a blanket or bend the knees slightly.
- Anchor both sitting bones and lengthen the spine. Broaden the collarbones. Palms press lightly into the floor.
- Without harboring tension, breathe here for 1 minute.
(3) SEATED TWIST
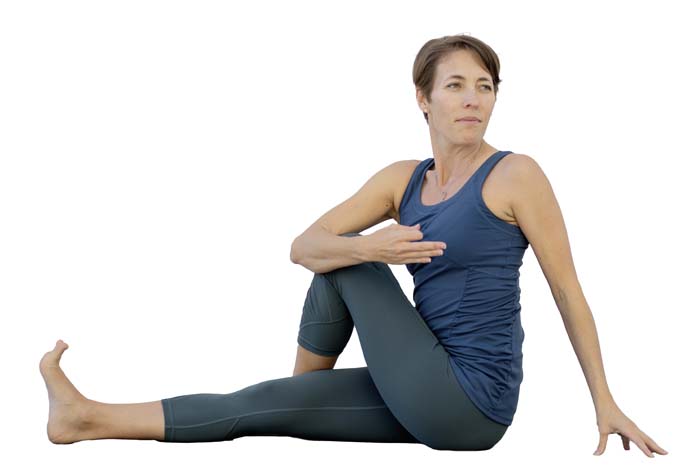
Start in Staff Pose:
- Take your right foot and cross it over your left thigh, so the entire foot can rest on the ground. Keep both sitting bones grounded and your spine long.
- Use your exhale to twist to your right. Your left elbow can hook around your bent right knee for support and your right hand can rest gently on the floor outside your right hip. Ideally, use your core strength to keep the pelvis neutral (not rocking back).
- Hold the pose for 2-3 minutes. Then move to pose 4. I promise we’ll repeat the second side in just a few minutes.
(4) HALF COW FACE POSE, VARIATION
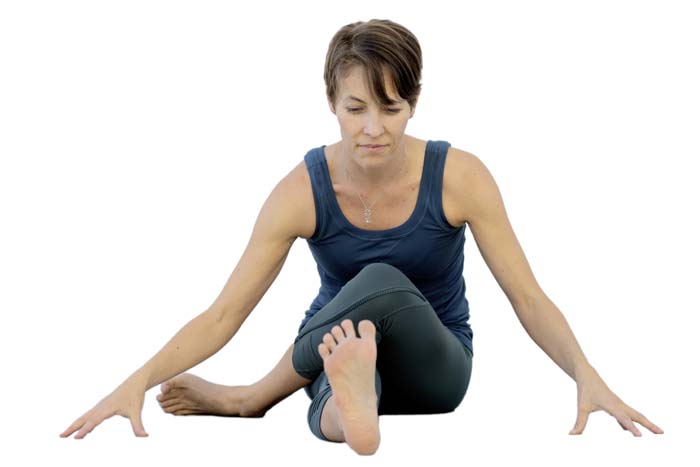
Ready to go deeper still into a low back release and outer hip stretch? Want more length in the hamstrings? This pose will give you all of this, plus room to calm the mind sense the pose is a forward fold. Keep your left leg extended and drop your right knee over your left (as close as it can get comfortably). Your right foot will likely end up somewhere outside of your left hip. Your spine will remain tall at first; your sitting bones pressing down into the mat. Then fold forward to any degree where you feel a gentle stretch at the back of your left leg, outer right hip, or low back. The tightest area of your body will give you feedback first. Continue to breathe deeply here for 2-3 minutes.
(5) REPEAT POSES 3 & 4 ON THE SECOND SIDE
You’ve twisted to the right and taken a fold with the right leg on top. Now, it’s time to even out your body. First, set yourself up to twist to the left. Then, after holding the seated twist for the same amount of time you took on the right, lower the left knee over the extended right leg and fold.
(6) PASCHIMOTTANASANA
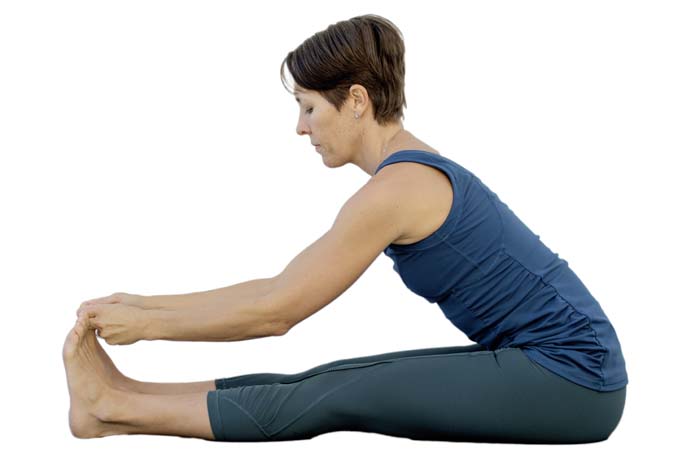
This yoga pose lengthens the entire back line of the body in a symmetrical way. It further releases any hamstring, low back, upper back, and neck tension that might have accumulated during your day.
Begin in Staff Pose.
- Anchor the sitting bones and back of the legs into the floor. Keep the spine long and chest open as you start to hinge the pelvis forward. Lengthen the front of the body as you continue to fold. Just make sure you can sustain a calm, deep rhythm of breath wherever you are. Bending the knees or sitting on a blanket can make this easier.
- Stay in the pose for 1-3 minutes.
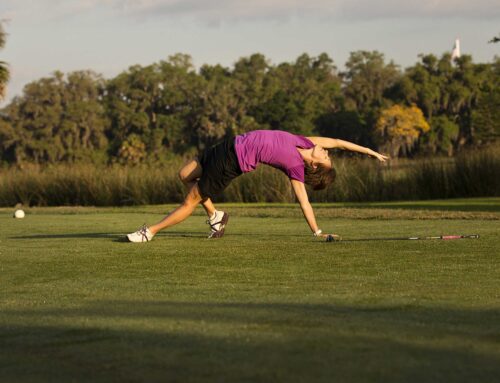
(7) SIDE-LYING STRETCH
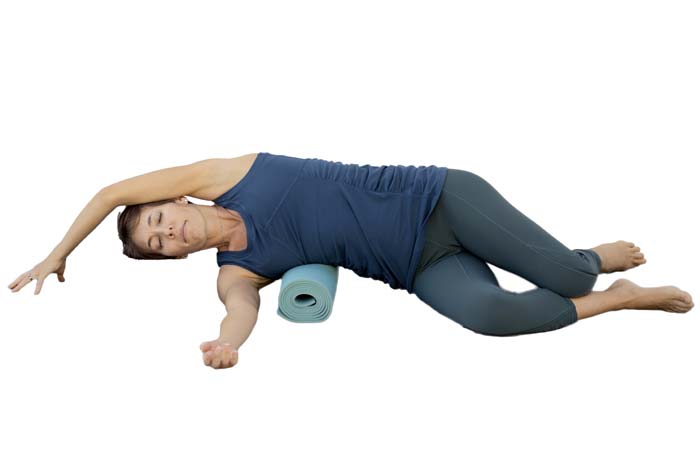 This side-lying stretch releases any tension in the intercostal muscles and opens up the ribcage to make breathing easier. You also relieve pressure on the gall bladder, liver, intestines, spleen, and stomach. This helps to improve your digestion, elimination, and detoxification.
Grab your Bolster or a Rolled Yoga Mat:
- Place the bolster or rolled yoga mat underneath your side ribs, with its long edge parallel to your spine. Have your block or blanket nearby as well.
- With your hips on the floor and knees comfortably bent, rest your side ribs on the bolster. Adjust the position of the block/blanket so your head can rest on it.
- Let your bottom shoulder hang toward the floor.
- Allow the top arm to rest on your side. Or, if comfortable for the shoulder, raise it overhead so that it can rest on the floor or a prop.
- Stay and breathe deeply for 3-5 minutes. Move to the second side when you’re ready. Stay for the same length of time there.
(8) SUPTA BADDHA KONASANA
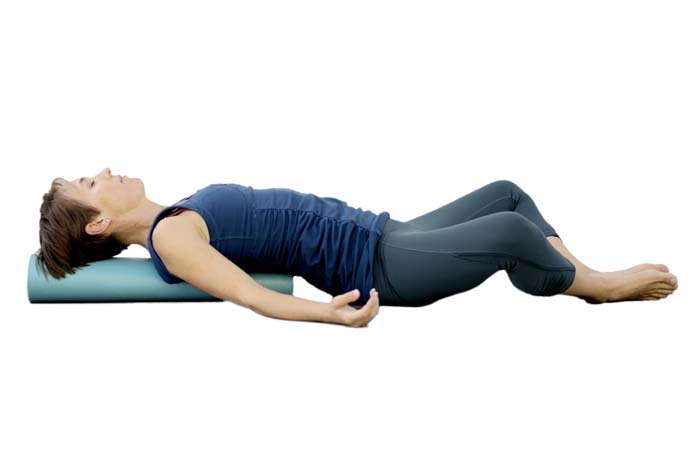
In yin yoga, this pose is known as Reclined Butterfly. It’s yet another way to open the chest after the rounding that often occurs when you swing a golf club. The abdomen and pelvis relax. Plus, the inner groin muscles re-lengthen after the engagement used to stabilize your stance when swinging.
Use a Rolled Blanket or Yoga Mat:
- Place your support in a vertical position behind the spine. Ideally, the back of the head and ribcage will be supported by it, and the low back can hang freely to release any tension in this area. The back of the pelvis will rest on the ground.
- Bend the knees and place the soles of the feet together. Arms can rest out to the side, straight or bent.
- You can also place a blanket under the back of your head for more comfort. Or, you can place blocks behind the knees for additional support, too.
(9) RECLINED FIGURE-4 POSE
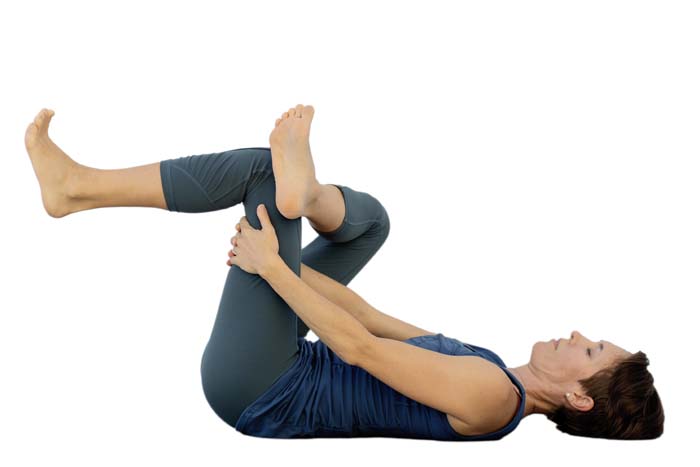
The hip stabilizers worked hard during your golf game to keep your swing steady. They also work continuously to step, move, and run. Now it’s time to elongate this muscle group. In particular, the piriformis lengthens and the sciatic nerve gets flossed. Plus, the lower back can release while supine here.
Begin on your back with your feet on the floor:
- Cross your lower right leg, just above the ankle, on your left quadriceps. Keep the right foot flexed. Stay here if you already notice a deep stretch in the outer right hip.
- To move on, draw the left knee toward your chest, reach between the inner thighs and grab anywhere behind the left hamstrings region. Keep moving the right knee out to the side while keeping the back of the pelvis evenly on the ground.
- Stay for 2-4 minutes on the first side. Then repeat left leg over right.
Additional Option: You can take Pigeon Pose instead if that is comfortable for your low back and hips.

(10) RECLINED SPINAL TWIST
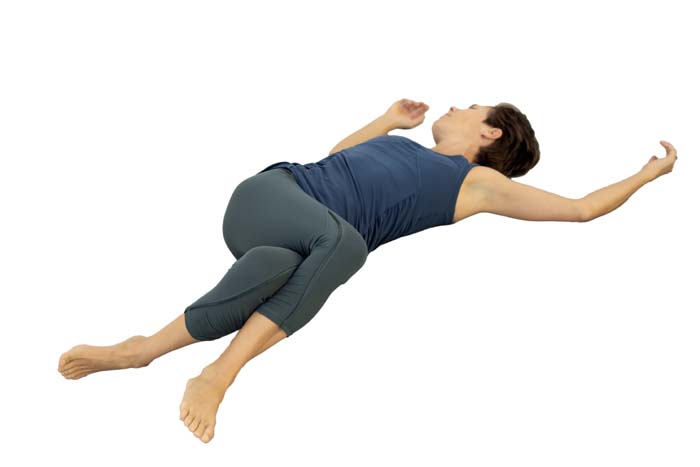
Not only does this Reclined Twist further stretch gluteus maximus, it elongates the sides of the abdomen, pectoral muscles, and neck. The goal is to keep a neutral spine and you then begin to rotate.
Start in constructive rest, on your back with the feet on the floor. Lift your hips and shift them two inches to the right. Then, drop your knees over to the left. A block or blanket can be placed under the knees, or between them, for more support. Extend the arms out to your sides and allow gravity to drop the back of your shoulders toward the ground. Let your head rest completely. Stay for 2-5 minutes on the first side, then switch.
(11) LEGS UP THE WALL POSE
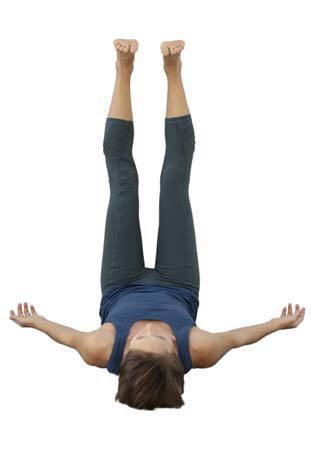 This is one of the best poses to revive the lower body after a long day on your feet. You get upside down, which shifts your perspective and the flow of circulation effortlessly brings blood back to the heart. Your nervous system also calms down into a restful state.
First decide if you will put your legs up the wall or on a chair. Then, sit with your side of the body next to the wall or chair and begin to recline down onto your back. Due to the lack of space, you will be forced to swing your leg up the wall or place them on to the seat of the chair. Allow the low back, pelvis, and legs to relax as much as possible. Your arms can remain in any position that’s comfortable to you. Breathe deeply for 4-8 minutes as you let all tension from your game melt away.
PUTTING IT TOGETHER
A gentle yoga class is a fantastic way to offset the accumulation of stress in your life and ward off exhaustion that follows an onslaught of demands. We use yoga to restore the body and mind. And, you can tap into this sequence regularly to boost your ability to meet the challenges in front of you. It’s also a way to gain a new perspective about your life, be inspired to make changes, and return to your current circumstances with greater energy levels.
Take Action Now:
- Carve out 45-60 minutes this week to restore your body and mind with this gentle yoga sequence.
- Invest in some RAD rounds for myofascial release, if you haven’t done so already. They are portable, sturdy, and smooth on the skin, and a really wonderful tool to restore balance to your connective tissue.
- Check out our 3H Project if you’re interested in learning how to meditate, or take your meditation practice to the next level. We have 3 meditations you can download for free to get started.


Love your website and your yoga and ides..inspirational
Thanks, Sandra! I’m so glad the material here resonates with you. If you have a specific topic for this summer you want me to cover, please let me know.
Thanks a lot. You are really a genious.So mice and helpful webside for everyone.