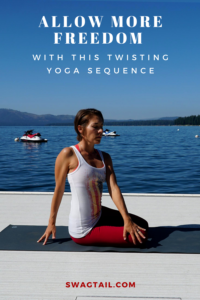
With the large amount of chaos in the world around you, it’s easy for anxiety and stress to dominate your mind. This leads to hypertension, shortness of breath, and decreased immunity in the body. Yet this twisting yoga sequence is one of the best ways to regain a sense of control in your own life. And breath-by-breath, you’ll create space in the tissue and receive inspired ideas. This all leads to more freedom in all aspects of your life.
As you might know, Steve and I go camping in the wilderness three or four months each year. And there really is something special about totally immersing yourself in nature. The colors of the surrounding trees seem brighter and the smells of the pine grow stronger. You can hear the sound of squirrels crunching pine cones or birds calling from high above.
We really do feel connected to the broader aspects of life and we appreciate what really matters most to us. Relationships are high on this list. And after weeks at a time without running water, we’re thankful for a hot shower and the dishwasher, too.
It’s interesting, though, that when we get home, the confines of a structure can make it easy to forget that sense of freedom. That’s why yoga is such a powerful practice to keep you aligned with the infinite power within you always. This twisting yoga sequence is dedicated to helping you find more of that freedom today.
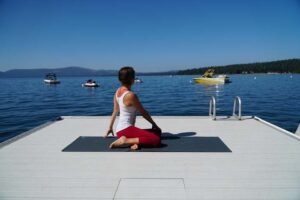
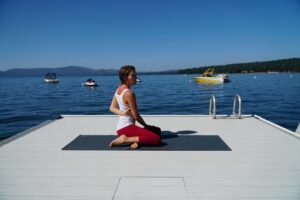
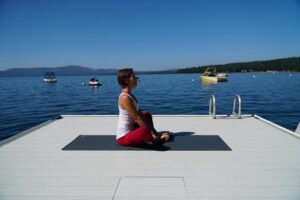
Photo Credit: Stephen Thompson
BENEFITS OF TWISTS
Twists are one of the main categories of yoga postures. They penetrate deeply into the core of the body–wringing out toxins in the internal organs and supplying them with fresh, oxygenated blood. A twisting yoga sequence also has the power to create spaciousness in the hips, spine, and shoulders. And whether done standing, seated or supine, twists help maintain resilience in your body tissues.
Twisting poses also lead to clarity of mind. It’s often harder to breathe when folded like a pretzel, which increases the amount of focus needed to sustain the breath in such poses. This increases your present moment awareness. Naturally unwanted thoughts fade away and space is created for new thoughts to enter in. And it’s in this gap where the magic really happens on the mat.
Suggested props for this sequence:
- One Block
- A blanket or bolster (optional)
Okay, when you’re ready, get on your mat and enjoy the freedom that comes from this twisting yoga sequence.
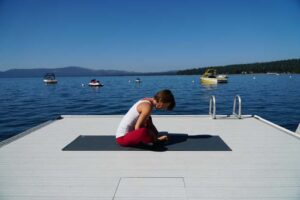
(1) START IN SAVASANA
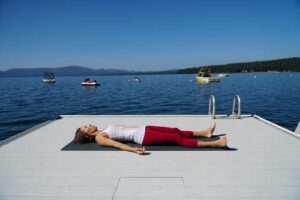
Purpose: Starting on your back gets you into a grounded place from which to start practice. Your spine will also be in a neutral position. Focus on the natural curves of the spine with each cycle of breath, and use this awareness as a point of reference once you begin twisting postures.
Length: 3-5 minutes
Additional Notes: A twisting yoga sequence will challenge a steady breathing pattern. Thus, I suggest you invite students to establish one here. Perhaps inhale to a count of four, and exhale that same count of four. Make sure students can sustain the breath without strain. Memorize it, and come back to it frequently during class.
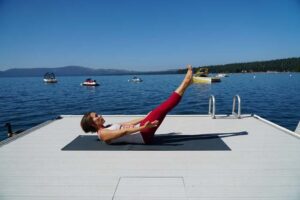
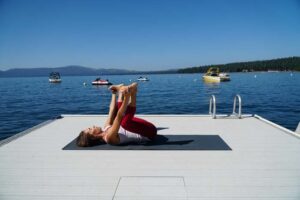
(2) CORE WORK
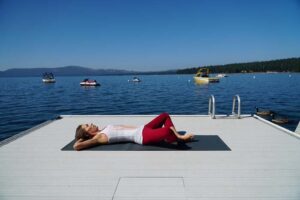

Purpose: Twists strengthen the core muscles, and targeting the abdominals right away gives students an immediate connection to this area.
Specific Instructions:
- Interlace the hands behind the head and open the knees wide into supta baddha konasana.
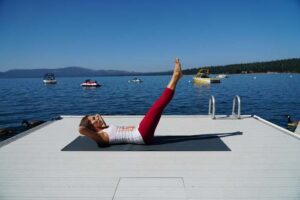
- Inhale lift the head, neck and shoulder blades off of the mat. Simultaneously, keep the feet together and bring the knees together.
- Exhale to stay, or extend the legs out at a 45 degree angle.
- Inhale back to the previous position.
- Exhale return head, neck, shoulders and knees back to the ground (your starting point)
Length: Repeat 9 times.
Additional Notes:
- Start with 3 rounds of the simple core exercise above. This can be sustained the entire time, or you can increase the intesity via the options below.
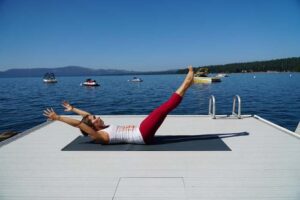
- You can make rounds 4-6 more challenging by reaching the arms forward as the legs extend to 45 degrees.
- For the final 7-9 rounds, you can make this more challenging still by reaching the arms overhead at the same time the legs extend.
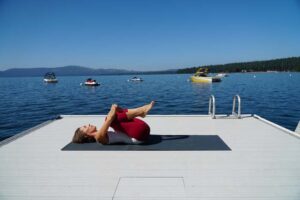
Counterpose: Hug the knees in toward the chest when done. Rock side to side to massage the spine as needed
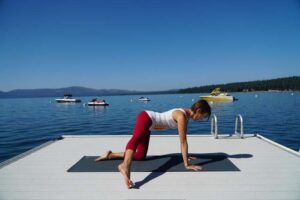
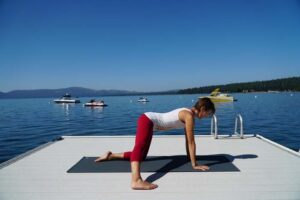
(3) CAT , COW, AND DOWNWARD-FACING DOG
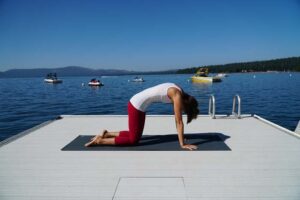
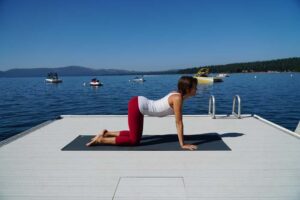
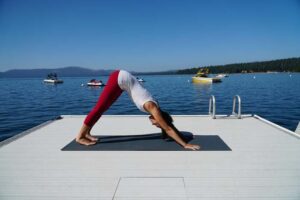
Purpose: The goal here is to warm up the spine with flexion and extension. Then, after a few rounds, add in more heat in the shoulders and legs with downward-facing dog.
Length: 5-10 rounds of cat / cow. Then hold down dog for 1 minute.
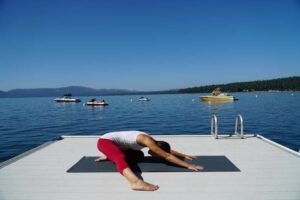
Additional Notes: You might encourage a child’s pose after down dog to connect with the breath before moving to the front of the mat for the rest of the flow.
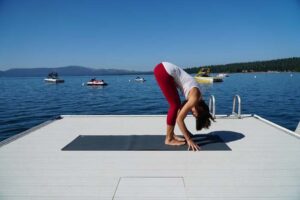
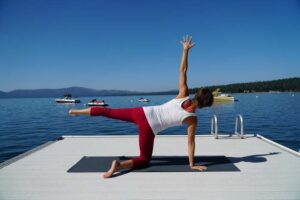
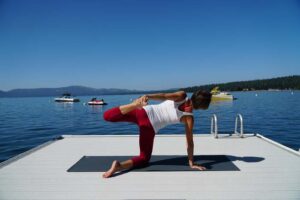
(4) UTTANASA AND TWIST
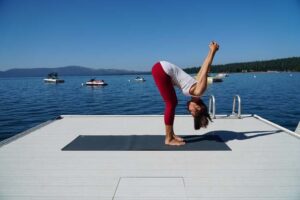
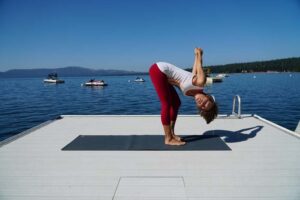
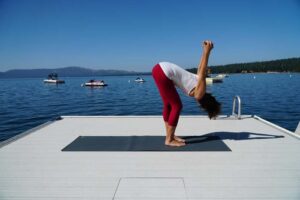
Purpose: The standing forward fold is a perfect way to elongate the entire back line of the body. We add the arm bind here to open the front of the shoulders, which will be necessary for bharavadajasana later in class. Obviously, this minor twist will also set the spine up for the work later as well.
Length: 5 breathes in the neutral forward fold, then 5 breathes in each side of the twist
Additional Notes:
- Grab a strap if the arm bind is not accessible.
- Use Adho Mukha Svanasana to bring balance to both sides of the body.
- Remember, child’s pose is always an option for your students, too.
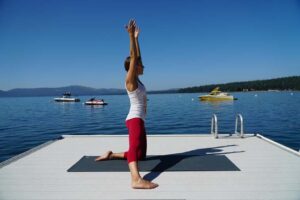
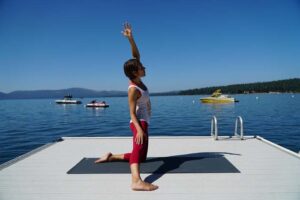
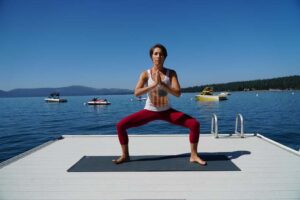
(5) SURYA NAMASKARA A (WITH HIP OPENING)

Purpose: Increase heat in the body with sun salutation A. This will prepare the body for the twisting work to come later in class.
Length: 3 complete rounds
Additional Notes: I suggest you take more time in down dog here to open up the hips. You can give students time to make circles or hold the variation pictured above. Consider these options on the first or third round of Surya Namaskara A.
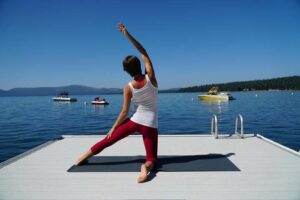
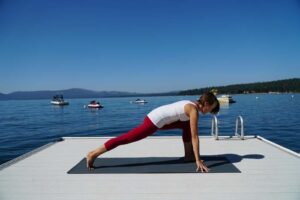
(6) FIRST FLOW
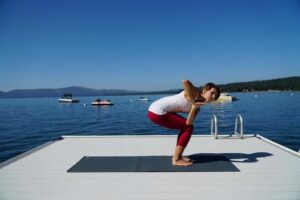

To get into each of the flow elements of this twisting yoga sequence, you’ll start the same way. This will include the following postures:
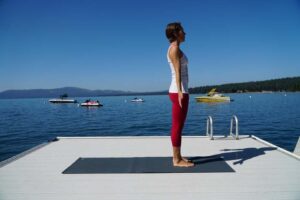
- Tadasana
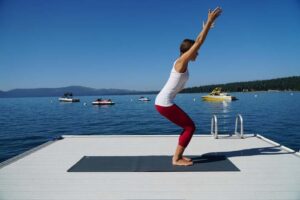
- Inhale to utkatasana (chair pose)
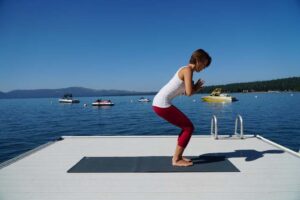
- Exhale into revolved chair pose.
- Put more weight onto the right foot as you hover the left (this will be opposite as you complete the second side). In either case, you’ll be more stable and ready to move into the next pose.
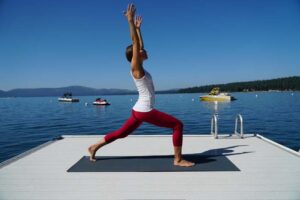
- Finish an exhale to step back to crescent lunge legs.
- Use the inhale to reach the arms up and take the full version of crescent.
Length: Take a few cycles of breath in each pose here to build the muscle memory.
Additional Notes: You can invite students to take a vinyasa between sides. Or, if you teach a more hatha style practice, you can simply step back to the front of the mat to uttanasana before moving to the second side.
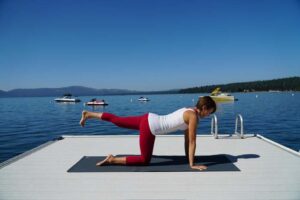
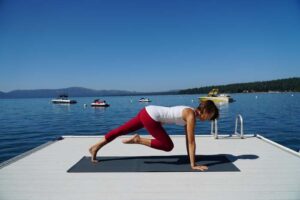
(7) SECOND FLOW
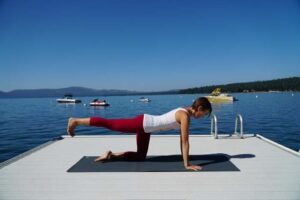
Start with the same postures above. Then, from a crescent lunge, go through a vinyasa or step right back to downward-facing dog.
From down dog:
- Exhale to drop the knees and come to tabletop position.
- Inhale to reach the right leg back, parallel to the floor and toes pointing down (leg internally rotated slightly)
- Inhale externally rotate that right hip and extend the leg out to the right.
- Exhale to tap the right toes to the floor (outside of the mat)
- Inhale to lift the leg again.
- Exhale back to parallel
Length: Repeat 3 times
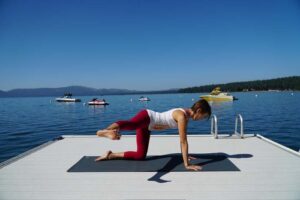
Then, enter the gate pose portion of the sequence (on the same side):
Take a fourth round to get your right leg out to the side of your mat. Then sit back and drop your hips back toward the mat. You’ll be in a child’s pose variation. If this strains the knee, stay in a puppy pose variation.
- Inhale the arms up, and exhale into gate pose (with your right leg still out to the side)
- Exhale arms down when done and move back into table top position.
- Inhale the left leg back behind you. Externally rotate that foot and turn your body toward the left side of your mat. Stay here or reach the left arm behind you to grab the left foot.
- Release carefully and set the left leg back behind you on the mat.
- Inhale to take gate pose on the second side.
Length: Hold each pose for 5 cycles of breath.
Finally, turn back to the front of the mat:

- Step the right foot forward into crescent lunge legs.
- Inhale up to a full crescent lunge position.
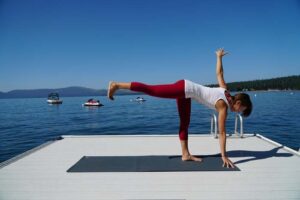
- Exhale forward into warrior 3
Length: Stay in warrior three for 5 cycles of breath.
Additional Notes: Fold forward into Uttanasana when done. Inhale back to Tadasana and pause to notice the difference between sides before repeating the above flow on the left side.
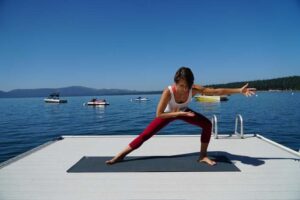
(8) THIRD FLOW
Start this flow in Tadasana, as you’ve done in 6 and 8 above. Then, from crescent lunge, move into the following standing postures:
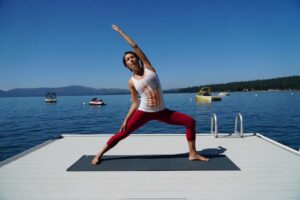
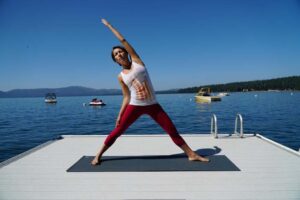

- Inhale into reverse warrior. Stay for 5 cycles of breath.
- Use the inhale to come into reverse triangle. Again stay for 5 rounds of breathing.
- Exhale into triangle. Stay for the same amount of time as the other two poses.
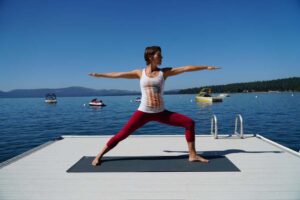
- Inhale back to warrior 2 for a breathe or two before moving on.
Next, turn toward the long edge of the mat:
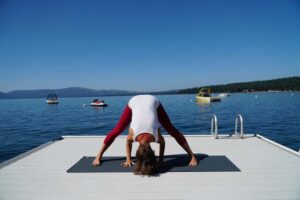
- Turn the toes slightly in and inhale to reach the arms up.
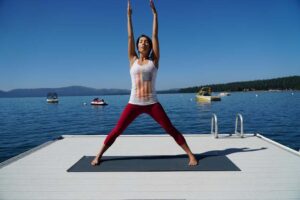
- Exhale into prasarita paddotanasana.
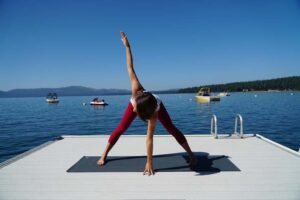
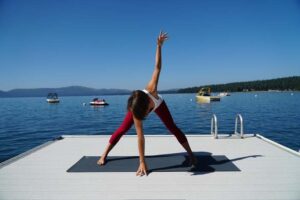
- Inhale to lengthen the spine.
- Keep the left hand on the floor (or block) and twist, reaching the right arm up. Hold for 5 cycles of breath before moving on to a twist in the other direction.
Continue to open the hips:


- Inhale to come back upright with the spine.
- Turn the toes out (knees in line with the toes) and exhale to bend the knees. This will place you in a horse stance.
- Stay in horse, or add movement by bringing the hips side to side.
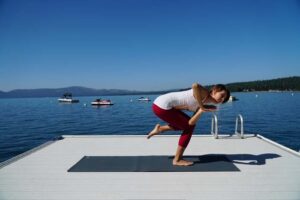
Then turn back to the front of the mat:
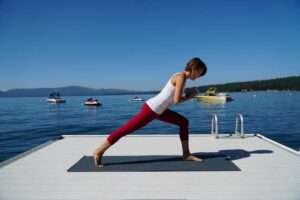

- Inhale to turn and face the front of the yoga mat again. You’ll pivot on the back foot to enter into crescent pose yet again.
- Exhale to hinge halfway forward
- Inhale into warrior 3.
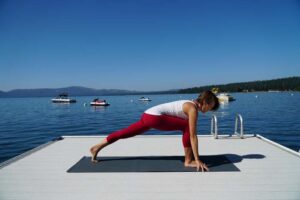
- Exhale to twist into revolved half moon (using the block as needed)
Additional Notes: Take a pause in this twisting yoga sequence. Invite students to become more aware of their breathing, and the new sensations in the body. Then repeat the above poses on the second side.
(9) DANDASANA
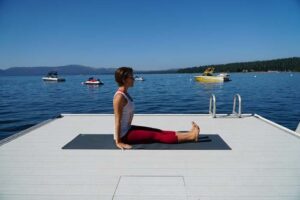
Purpose: The goal here is to take a symmetrical posture to assess how the twists and movement done previously has created space in the body. You also want to intensity awareness on the sitting bones as a base of support for the rest of the seated poses in this twisting yoga sequence.
Length: 5 rounds of breath
Additional Notes: Bend the knees as needed to soften the intensity on the back line of the body. Or students can also use a strap to reach the feet.
(10) BHARADVAJASANA
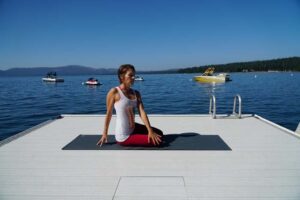
Purpose: This is not a common twist in yoga classes, but it’s one of my favorites. There is a slight imbalance as one sitting bone comes off of the ground to twist. Plus, it requires lots of core strength to sit upright and much side body length to get into the full version. Did I mention there’s also shoulder opening required as well?
Length: Spend 1 minute in each side.
Additional Notes:
- You can keep the arms open if the full bind is not accessible.
- You can prop the lower sitting bone on a blanket if the area is tender, or the side body is tight.
- Look in the opposite direction of the twist (gaze left as the body moves right and vice versa). This reminds you of the power you have in each moment simply with your attention.
(11) FORWARD FOLDS
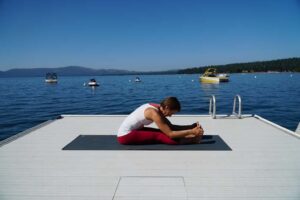
Purpose: It’s time to turn inward and appreciate the mental and physical space created by this twisting yoga sequence. We’ll use paschimottanasana and baddha konasana to do this.
Length: Hold each pose for 1-2 minutes
(12) BRIDGE POSE
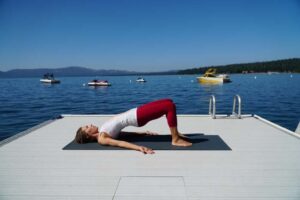
Purpose: Open the heart and celebrate new insights and spaciousness with bridge pose. It’s also another symmetrical way to check in around the spine. Plus, it’s adds energy to the positive changes being made on the mat.
Length: Take 1 – 3 rounds of bridge, holding for 5-7 cycles of breath each round.
Additional Notes: You can make this pose more restorative by placing a block under the sacrum.
(13) RECLINED FIGURE FOUR & TWIST
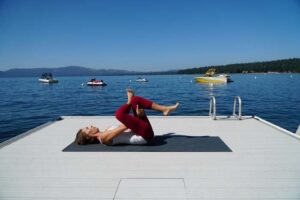
Purpose: The hip stabilizers were used often in this class for all poses in the standing elements of this twisting yoga sequence. You’re going to stretch those areas now to create balance in the tissue.
Length: Hold each for 1-2 minutes
Additional Notes:
- Prepare for figure four by externally rotating the leg that’s on top, while the the bottom foot is still on the floor.
- You can use your hand as a kickstand to keep the top knee pointing toward the sky in the twist.
- If the figure 4 variation of this supine twist is not comfortable, simply stack the knees.
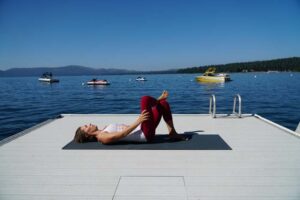
(14) HAPPY BABY AND SUPTA BADDHA KONASANA

Purpose: Release any remaining tension in the low back or spine with these final hip opening poses.
Length: Hold 1-3 minutes each.
Additional Notes:
- You can stay on your mat for supta baddha konasana.
- Or, you can move to one side after happy baby and roll up your yoga mat. Place the mat under your back to create a bit more heart-opening at the same time your hips release with the knees wide.
- Stay in the supported supta baddha knonasana version for savasana if you’re comfortable there.
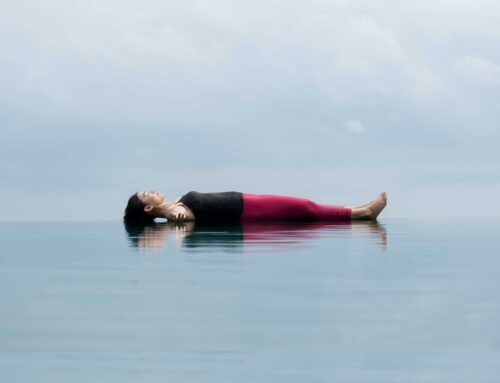
(15) SAVASANA
Purpose: Let the effects of your twisting yoga practice settle in as you rest in savasana.
Length: 3-5 minutes
Additional Notes: Consider revisiting the same pranayama started at the beginning of practice. With the space created in the core and lungs via twists, students might notice it easier to take an elongated breath count at the end of class.
PUTTING IT TOGETHER
Circumstances in the world might seem chaotic or uncertain much of the time. Yet instead of being a victim to your surroundings, step into your freedom and power with this twisting sequence. You’ll increase your health, focus, and creativity as you do. Plus, you’ll have greater trust in your inner guidance system and a confident knowing that all is working out for you.
Take Action Now:
- Download the one-page PDF of this twisting yoga sequence above.
- Subscribe to our YouTube Channel to take this sequence, and other classes like this, from the comfort of your home.
- Share your favorite twisting poses (and sequences) with us in the comments section below!


Wow! Thanks so much. I’m teaching tomorrow and was looking for a twisting sequence and you really inspired me!