
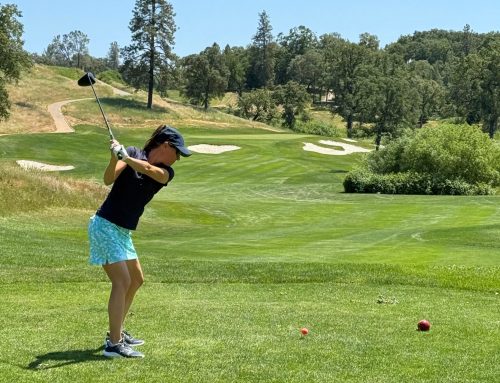
Wheel pose is a challenging yoga asana that requires length in the front of the body while the entire back line is engaged. You need open hips, quads and shoulders to do this posture safely. It also requires courage to shift your entire perspective upside-down and expose your heart to the world. Yet, there is immense freedom that results from taking the shape–freedom in both the body and mind. So hop on your mat today and enjoy this slow flow that guides you strategically into wheel pose.
I have to make a confession first.
Wheel pose is not one of my favorites. Like many athletes who do yoga, I’ve got tight hip flexors and shoulders. Yoga has helped tremendously over the years to keep me mobile and strong. It’s also a practice that has helped me accept and appreciate my own capability levels.
That’s why I love how you can sequence a series of poses to prepare the body for greater challenges. And you can focus on the journey to get the destination (instead of the destination itself)
So whether or not you take wheel pose in this slow flow yoga sequence, enjoy the freedom in the hips and shoulders that comes from it. Who knows? You might even start to like wheel pose a bit more (like me) when you take time to get there methodically.
Photo Credit: Thanks to Christina Rairdan of Bend Yoga for the photo location
FREEDOM YOGA FLOW DETAILS
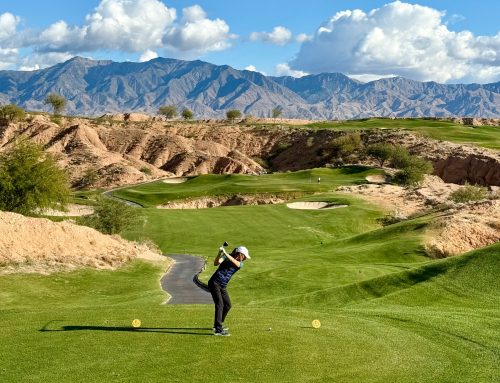
Moksha is liberation, or freedom, in Sanskrit. This freedom takes many forms. It can appear as spaciousness in the body, often experienced through movement in asana. It’s also expansion of the mind from previous ways of understanding the world. Freedom also comes in recognizing yourself as a spiritual being—a powerful creator that can influence your life experience when connected to this broader aspect of yourself.
In regards to wheel pose, this slow flow sequence will create openness in the hip flexors, shoulders, and spine. This will create more freedom to get your body in this shape. Urdhva Dhanurasana is also an inversion, where you’re invited to view yourself and your environment from a new vantage point. And since you’ll expose an open heart in this posture, you can break free from limiting thoughts and emotions that are no longer serving you (and thus connect to your Divinity in the present moment).
So, when you’re ready, get on your mat and enjoy the freedom that comes with wheel pose.
An Important Note to Remember
This sequence is less about the peak posture and more about the journey to it. You might not practice wheel pose. Many of your students might not be ready for it either. However, You can repeat this flow over and over again to prepare the body for it. Then when the time comes, simply repeat bridge pose instead of moving into Urdhva Dhanurasana. The freedom you experience in the body and mind can be just as intoxicating!
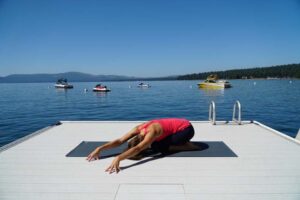
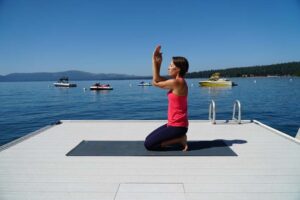
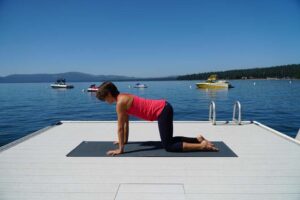
(1) START IN CHILD’S POSE
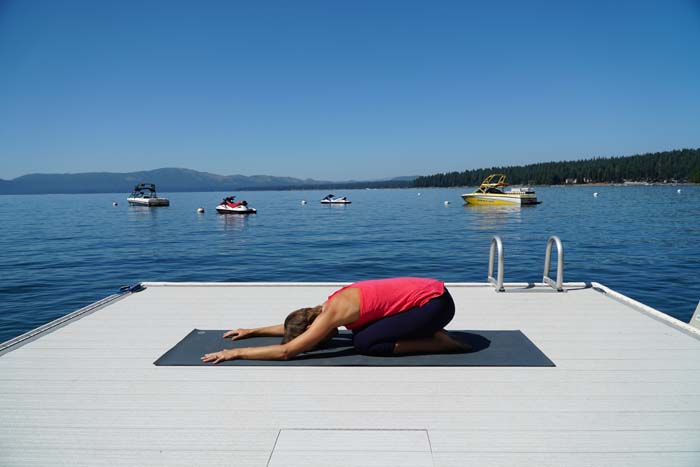 Purpose: Start in child’s pose to expose the back of the heart. This will bring your awareness to the part of the body that will need to engage in order to get into wheel pose later on in the sequence. And it’s a great way to have your forehead on the ground—and release any negative thoughts you don’t want to carry into the practice. This lease space to set a new intention in its place.
Length: 2-5 minutes
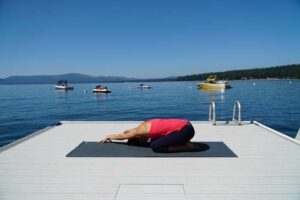
Take a Side Stretch while here
Come on to the fingertips and move the breath into the side body. Walk the hands over to the left. Take 5 cycles of breath into the right ribs, then use the inhale to move back to center. Exhale hands to the right and take 5 cycles of breath into the left side.

(2) OPEN THE SHOULDERS

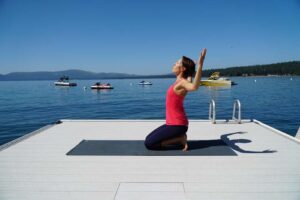
Purpose: Keeping the toes tucked in this position is a fantastic way to bring awareness to the feet, a foundation to come for the many poses ahead. Then, it’s time to focus on the shoulders. Use the inhale to open the arms into cactus position and then use the exhale to move them into eagle arms.
Length: 5-7 rounds of these movements
Additional Notes:
- If full eagle arms are not possible, simply bring the forearms to touch or as close as possible.
- You can stand on the knees (similar to camel) or simply sit in Vajrasana if either position is more comfortable. Then, continue with the upper body movements noted here. The point is to retract and protract the shoulder blades to increase mobility in the shoulder girdle.
The yoga sequence to improve core strength below takes a total of 15 minutes to complete. We alternate strength-building poses with lengthening ones to create more balance in the body. You will definitely feel the burning sensation as the muscle fibers fire, and you form the muscle memory necessary to tackle these poses and more. I recommend using a timer to keep yourself on track. Maybe even take a video of yourself to track your progress over the course of a few months.
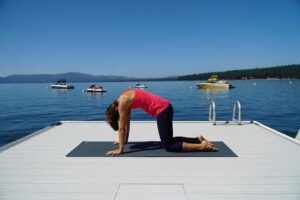
(3) WARM UP THE SPINE
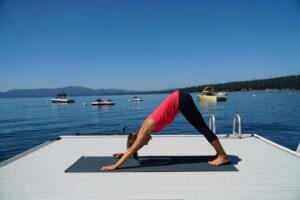
Purpose: Down dog is a great first stop to stretch out the calves and feet after broken toe pose. It also builds heat in the upper body which will prepare you to get into wheel pose later.
Length: Hold down dog for 1 minute, then take 5-7 rounds of cat/cow.
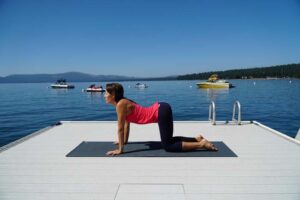
Next, visit Puppy Pose
After your cat/cow movements, come back to a neutral spine. Keep the belly button drawing in (core engaged) as you walk the hands forward into puppy pose. Remember to keep the hips above the knees. Take 5-10 rounds of breath in puppy pose before returning to downward facing dog.
(4) BUILD HEAT IN THE LEGS
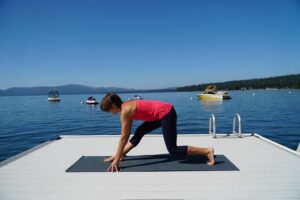
Purpose: You want strong legs to lift you into wheel pose later in class. This cycling of the legs helps you tap into that strength. You also create flexibility in the hip flexors and hamstrings with these movements. Here’s how it works:
- From Uttanasana, inhale and step the left foot back (so the legs are set up for crescent lunge).
- Take a full cycle of breath to set up, coming on to fingertips or adjusting blocks under the hands.
- Exhale to bend the back knee.
- Inhale straighten the front leg (while keeping the back knee bent).
- Exhale to straighten the back leg (so both legs are now straight)
- Inhale and re-bend the front knee so you’re back where you started originally.
Length: Repeat the above cycle 3-4 times.
Additional Notes:
- You can reverse the steps above to make it a bit more challenging for the brain.
In between sides…

- Step the left foot forward and fold (Uttanasana)
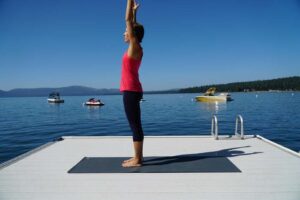
- Inhale to Urdva Hastasana
- Exhale to Chandrasana (arms up to the left), Inhale back to center, Exhale Chandrasana (arms to the right), Inhale to center
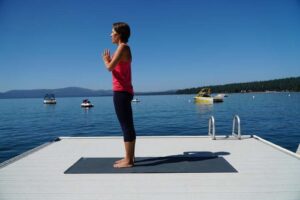
- Exhale to Tadasana. Reconnect with the intention you set in class, and increase your awareness in the moment.
The transition
- After a few cycles of breath there, inhale the arms back to Urdva Hasasana and exhale to fold.
- Then step the right foot back, and repeat the leg cycles in the first part of Step 4 above.
- Once done with the second side, step back to Down Dog.
(5) STRENGTHEN THE LOW BACK

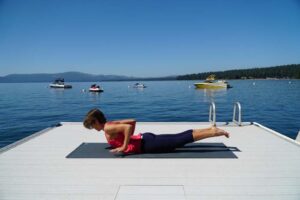
Purpose: The back side of the body engages in wheel pose to elongate the front side. That’s why plank is a great pose to strengthen all muscles around your core. Then, lower to the floor and prepare for Shalambhasana. I suggest keeping the arms in by your side for cobra and hover the hands. This targets retraction of the shoulder blades. This will help the body memorize this strength for later in class.
Length: Hold plank for 3-5 cycles of breath. Take 2-3 rounds of Shalambhasana.
Additional Notes: Use down dog, or child’s pose as your rest, after this sequence. Then step forward on your mat to prepare for Surya Namaskara C ahead.
(6) SURYA NAMASKARA C
Purpose: Surya Namaskara C is an active way to warm up the entire body while simultaneously lengthening the hip flexors. Both are aspects elements to prepare the body for wheel pose.
Length: 3-4 rounds on both sides.
Additional Notes: You can take an extra cycle of breath in down dog if your students are not used to a fast-paced flow sequence
(7) CHAIR POSE

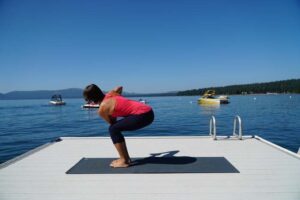
Purpose: Utkatasana is the posture to build even more heat in the legs, and the twisting element in this pose elongates the sides of the body. This length will help you with wheel pose later in class.
Length: 5-7 cycles of breath in each variation.
Additional Notes: Take a wide-arm twist if the elbow-to-knee version is not available to you or your students.
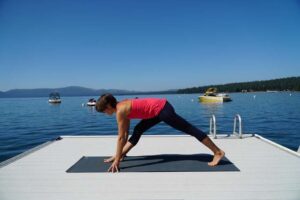
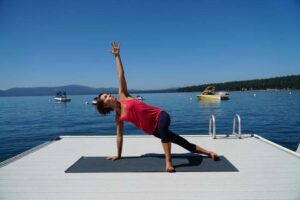
(8) LONG FLOW TO FIND FREEDOM IN THE HIPS, HEART, AND SPINE

Purpose: Now that the body is warm, it’s time to use more postures to open the shoulders and front side of the body. Here are the poses to do that:
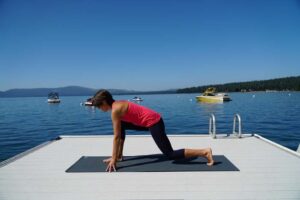
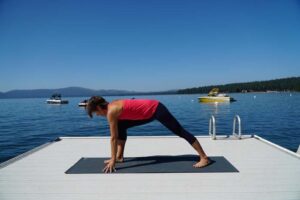
- Crescent lunge: I like easy transitions, and stepping one foot back from Uttanasana makes crescent lunge one of my favorites. You can focus on the lefts first, keeping the finger tips on the floor. Then, when you add the arms, you engage the core (which helps for wheel pose later)
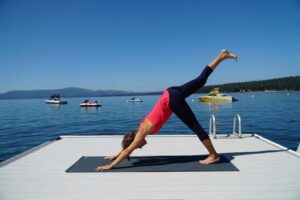
- Three-legged down dog: After you windmill the hands to the floor, take your inhale to lift the front leg up and back into a three-legged down dog. Think heat and alignment and balance. You can create more freedom in the hips if you bend that top knee and make a few circles with the leg.
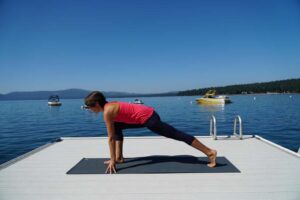
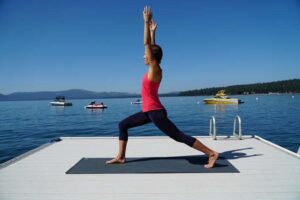
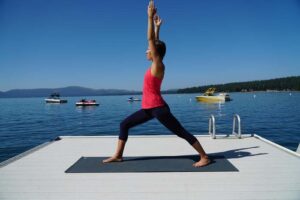
- Warrior 1: Step that right foot forward again, only this time you will end up in warrior 1. Focus anchoring down through the back foot, while bending the front knee deeper, to open the hip flexor on the back leg.
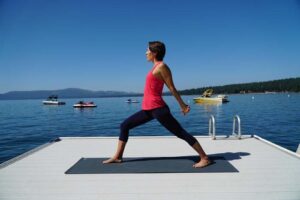
- Humble warrior: This adds the chest and anterior shoulder opening in preparation for wheel pose.
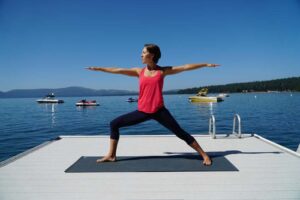
- Warrior 2: This is a transition pose that also creates a firm foundation with the feet. It also opens up the outer hips and can make Urdhva Dhanurasana easier down the road.
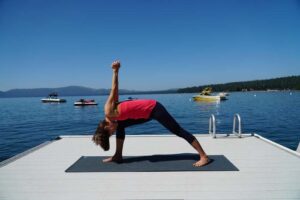
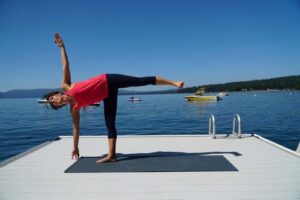
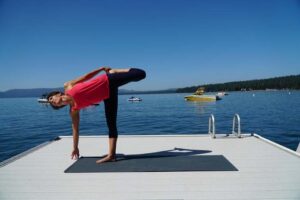
- Ardha Chandrasana: Challenge your balance by standing on one leg here, elongating both sides of the body as you breathe. It’s optional to move into Adrha Chandra Chapasana from here to further lengthen the front of the lifted leg.
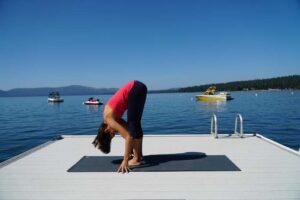
- Uttanasana: Finish the sequence in a grounding forward fold. Take a single cycle of breath here to keep moving, or hold for a few cycles if desired.
Complete Both Sides
You start and end the sequence at the top of the mat in Tadasana. You can take an optional vinyasa between sides if that is the style of practice you teach.
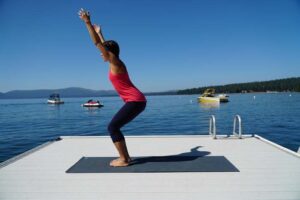
(9) KING DANCER
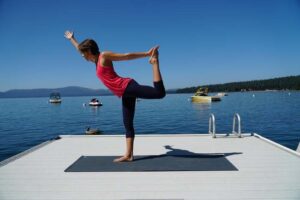
Purpose: This standing balance has many of the same ingredients as wheel pose. The standing leg must press into the ground for stability. The lifted leg is bent at the knee with the hips extended—which requires a long rectus femoris. Plus, the arms are involved. The arm holding the foot gets a stretch on the front side of the shoulder and pecs. And the arm that is lifted elongates the lats (necessary for wheel pose).
Length: Once in the posture, take 5-10 cycles of breath.
Additional Notes: Pause in Tadasana between sides to increase your awareness and reconnect with your intention before moving on.
(10) PREPARE THE ARMS WITH SIDE PLANK

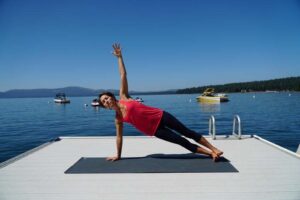
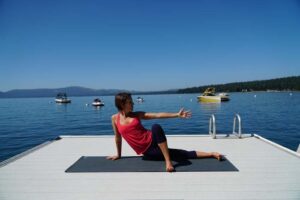
Purpose: Wheel pose requires upper body strength and plank builds this endurance. That’s why plank and side plank make an appearance in this flow that moves toward wheel pose.
Length: Hold 30-60 seconds in each variation.
Additional Notes:
- Take forearm plank and forearm side plank if the wrists are injured.
- Bend the top knee and place the sole of the foot on the floor (in front of the body) for more support.
- Drop the hips toward the floor after your side plank to stretch out the side body even more in preparation for wheel pose. This also targets the outer hips, which when tight, can hinder getting into our peak pose.
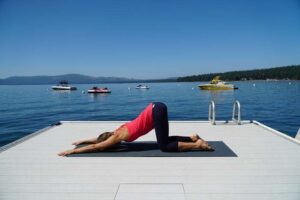
(11) SPHINX
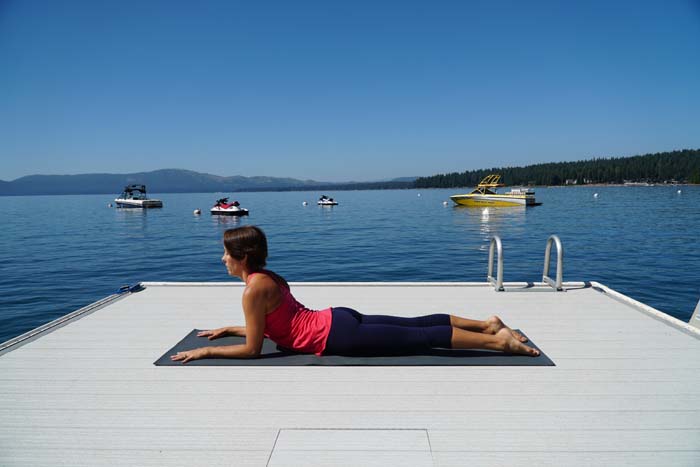 Purpose: The entire body is likely now very warm and ready to back bend even more. Sphinx is a deeper pose than Shalambhasana done earlier and it’s another specific way to prepare for the inverted back bend next.
Length: 1 minute
Additional Notes:
- Simply roll over on to your back (without changing your configuration on the mat to make a seamless transition into bridge pose next.
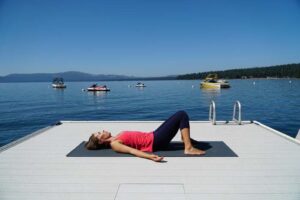
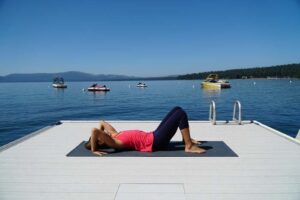
(12) BRIDGE POSE
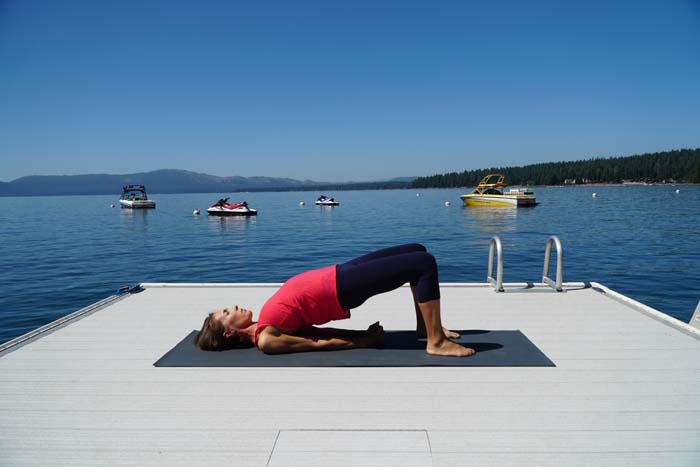
Purpose: This is yet another back bend to prepare for wheel pose. It’s also a great first stop in case students can’t get into the peak pose and want to repeat this for the same benefits of back bends.
Length: 1 minute
Additional Notes:
- The bind behind the back is optional, but another great way to integrate shoulder-opening needed for wheel pose.
(13) PEAK POSTURE: FIND FREEDOM IN WHEEL POSE
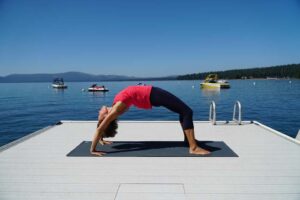
Purpose: Wheel pose is a great way to stretch the chest and lungs, as well as increase your energy and combat fatigue. Upward-facing bow also enhances the nervous system and improves hormone secretion that keep your body in optimal health. It’s also an inversion–a great way to flip your perspective and stay emotionally balanced. You’re more than ready for this pose after a 45 minute warm-up, so enjoy!
Length: Hold for 5-10 cycles of breath. Repeat 2-3 times
Additional notes:
- Use a wedge below the hands if the wrists are tight.
- Experiment with hands and feet in a slightly wider position than normal. This can create more space to get into the pose.
- Make sure you rest the spine in a neutral position (Savasana, perhaps with knees bent) to absorb the changes from this powerful pose before moving on.
(14) COOL DOWN SEQUENCE
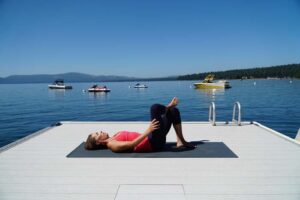
Purpose: About 70 percent of this flow yoga sequence to get into wheel pose. This means that you want to be efficient in how you balance out the body after it. To do this, we’ll spend time on the back. Figure 4 stretches the piriformis, gluteus muscles, and low back. Then a supine twist rinses out the spine. Staying with figure-4 legs increases the stretch to the outer hips as well. The best part is that no fancy transition is needed since you just finished wheel pose and will end on your back anyway.
Length: 1-2 minutes in each posture.
Additional Notes: Stick with a simple reclined twist if this leg variation doesn’t work for you.
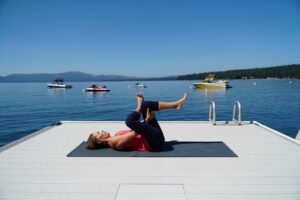
(15) HAPPY BABY
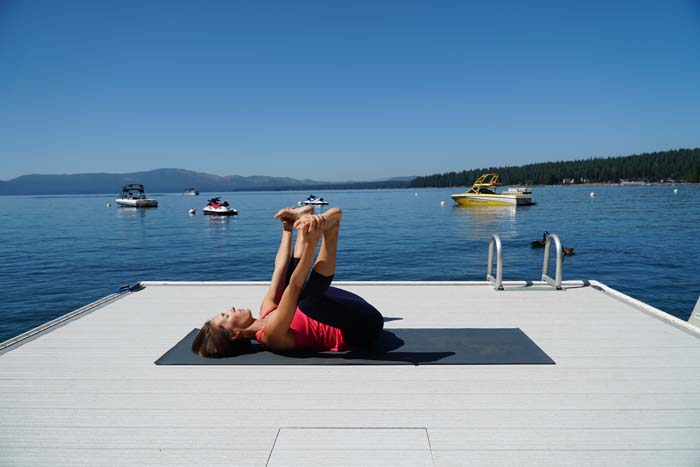 Purpose: This is a symmetrical posture that opens up the inner groin and massages the low back even more.
Length: 30 seconds – 1 minute
Additional Notes:
- Push the feet upward to stretch out the space between the shoulder blades (which worked during your wheel pose)
- Roll around to give more release to the low back.
- Simply hug the knees toward the armpits if the feet up to the sky is uncomfortable.
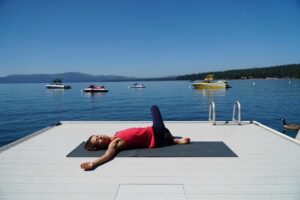
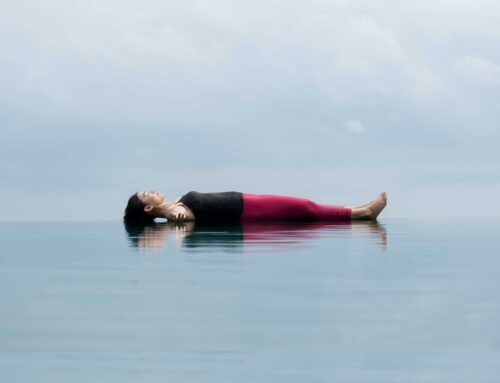
(16) SAVASANA
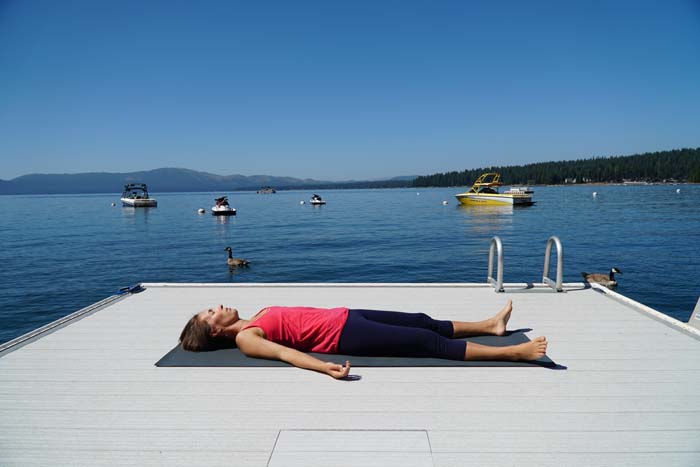 Purpose: It’s time to integrate all of that you have learned today on the mat. Resting in stillness is the best way to do this.
Length: 5-7 minutes (longer if this sequence runs 75 minutes total)
Additional Notes:
- Place a bolster or rolled blanket behind the knees to create more space in the low back.
- If you’re at home, and you want to balance out your energy even more, legs up the wall is a great choice to offset the energy created in back bends done in class.
- Use this time here to set an intention for what’s next in your day, and how you will best utilize the space and insight created on the mat.
PUTTING IT TOGETHER
Wheel pose is a challenging yoga asana that flips your perspective on life and opens the heart. To get into it, though, you need an open front side of the body. And you’ll also need strength in the legs, arms, and entire back line. Use this sequence over and over again to prepare for this powerful pose. And, enjoy the freedom that comes when you create mental and physical space along the journey.
Take Action Now:
- Download the 1-page PDF above to save time in the planning process for your next class!
- Share your own favorite poses to prepare for wheel pose in the comments section below.

Leave A Comment